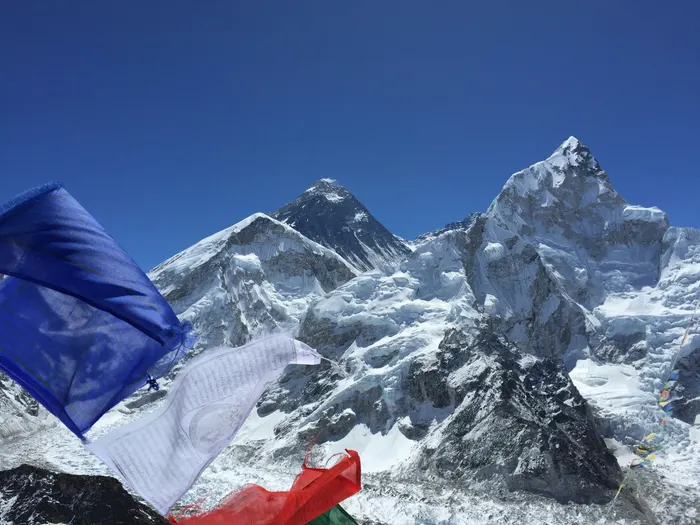
Everest Base Camp and Cho Oyu Viewpoint Trek: 15 Days
Almost every Everest trekker ends at the same two places: the ice rubble of Base Camp at 5,364 meters and the sunrise cairn on Kala Patthar at 5,545 meters. Then the trail goes home the way it came. The Everest Base Camp and Cho Oyu viewpoint trek breaks that loop. It walks the classic Khumbu corridor to the foot of Everest, climbs Kala Patthar, then turns west into the Gokyo Valley instead of retracing east, finishing under the enormous west face of Cho Oyu at 8,188 meters. Fifteen days, two valleys, and four 8,000 meter peaks on one skyline.
This guide covers the route honestly: what the day-by-day itinerary actually looks like, how hard the extra Gokyo leg is, what the trek costs in 2026 and 2027, which permits you carry, how to sleep and eat above 4,000 meters, and the mistakes that turn a great itinerary into a miserable one. If you are still deciding whether a Himalayan trek belongs in your year at all, our complete guide to trekking in Nepal is the right place to start before you compare routes.
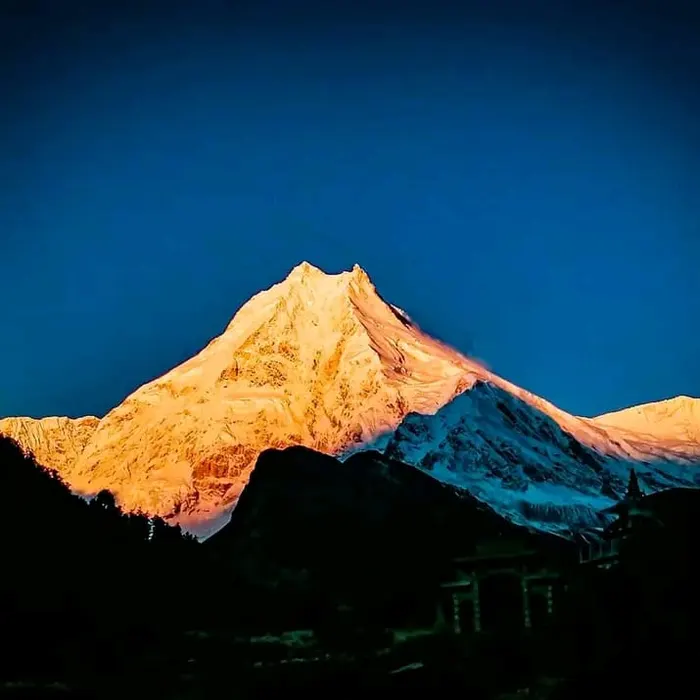
Two Valleys, Four 8,000m Peaks: What This Route Actually Is
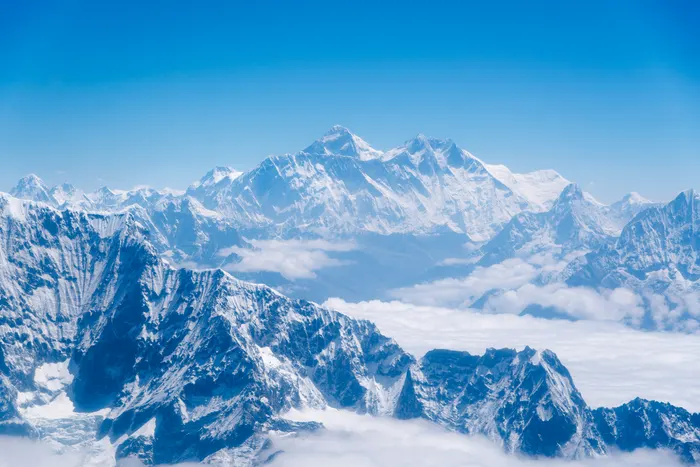
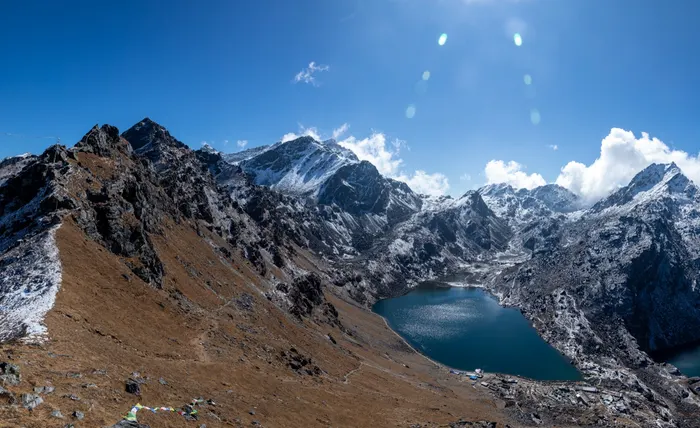
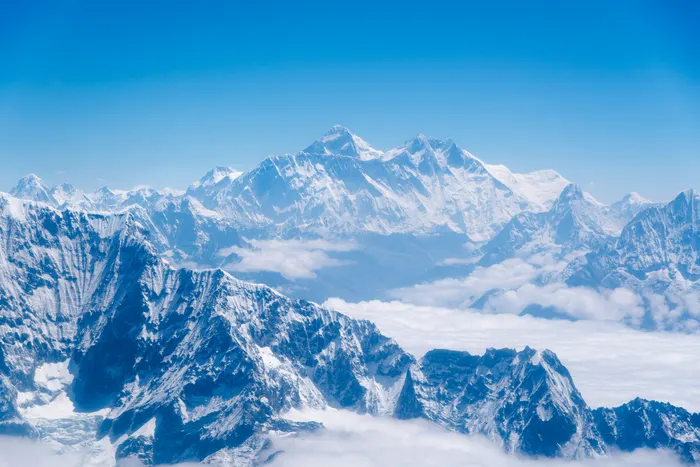
The Khumbu, the upper valley system of the Dudh Koshi river in Solukhumbu District, contains the densest cluster of high mountains on the planet. Everest stands at 8,849 meters, Lhotse at 8,516, Makalu at 8,485, and Cho Oyu at 8,188. From the floor of the main Everest trail you can see pieces of them, but the valley walls hide more than they reveal. The Gokyo Valley, one drainage west, opens a different angle entirely: from Gokyo Ri at 5,357 meters the four giants line up in a single sweep, with the Ngozumpa Glacier, the longest glacier in the Himalaya at roughly 36 kilometers, spilling below you and the six sacred Gokyo Lakes strung out in turquoise below that.
That is the whole idea of this trek. You do not choose between the Everest experience and the panorama. You walk the busy corridor to Base Camp and Kala Patthar first, when your legs and lungs are freshest and your acclimatization is building, then cross the Dudh Koshi at Dole into the quieter Gokyo side for the payoff view. The Gokyo Valley sees a fraction of the traffic of the main trail, so the last four days feel like a different trek altogether: rhododendron and juniper instead of yak trains, small lakeside lodges instead of crowded teahouse rows, and long stretches where the only sound is wind off the Ngozumpa.
It also solves a practical problem. A standard return trek from Lukla to Base Camp repeats the same ground twice, which is boring on the way down and hard on the knees. A loop that exits through Gokyo and back over the Mong La gives you new terrain on the return leg, a second acclimatization ladder, and a genuine reason to carry a camera the whole way. The trade is time: this is a 15-day itinerary, not a 12-day dash, and the extra days are precisely what makes the high points safe and enjoyable.
What Makes the 15-Day EBC and Cho Oyu Viewpoint Trek Different?
This trek combines two separate Everest itineraries into one continuous loop. You walk the main Khumbu trail to Everest Base Camp and Kala Patthar, then instead of retracing your steps you cross into the Gokyo Valley, climb Gokyo Ri for the four-peak panorama, and walk out over the Mong La. The result is 15 days with two acclimatization days, a genuine loop, and far more varied scenery than a standard out-and-back.
The most common Everest itinerary is the 12 to 14 day out-and-back. It works, and thousands of people do it every season. But it has two structural weaknesses. First, every hour of the descent is a rerun of the ascent, which is mentally flat and physically punishing on steep downhill sections like the Namche switchbacks. Second, it stops at the base of the mountain without ever showing you the mountain's neighbours in any coherent way.
The second big difference is the altitude profile. This route reaches 5,545 meters on Kala Patthar, drops back to 4,038 meters at Dole, then climbs again to 5,357 meters on Gokyo Ri. That is a lot of up and down, and it demands respect, but the drop into the lower Gokyo Valley is also a genuine recovery window. Many trekkers report feeling stronger on Gokyo Ri than they did on Kala Patthar, because the body has had a night or two of thicker air in between.
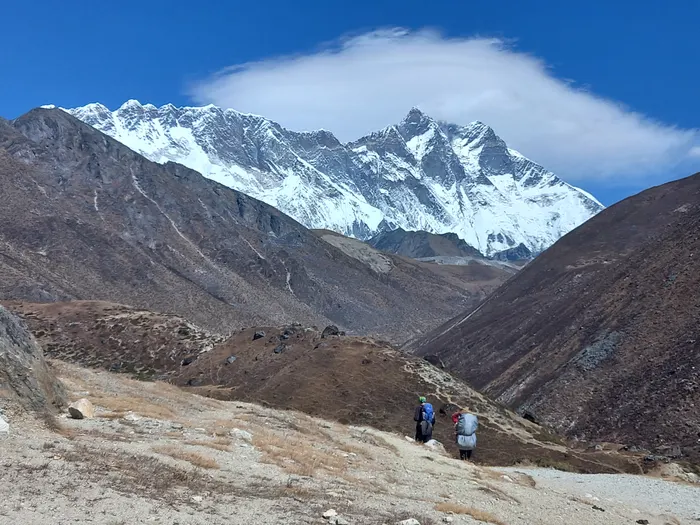
Third, the Cho Oyu element itself. Cho Oyu means Turquoise Goddess in Tibetan, a reference to the colour of its glaciated face at dawn. It is the sixth highest mountain in the world and the western anchor of the panorama. On a standard Everest trek you may glimpse it from a distance on a clear morning and never know what you are looking at. Here you spend two nights in the valley directly beneath it, walk to the fourth and fifth lakes where its base camp approach begins, and see the whole west face turn orange before the sun reaches the lakes. For photographers and for anyone who wants the mountain sense of scale rather than just the tick of Base Camp, that is the difference worth paying for.
What Does the 15-Day Itinerary Look Like, Day by Day?
The itinerary runs Kathmandu to Lukla by mountain flight, up the Khumbu to Everest Base Camp and Kala Patthar, across to the Gokyo Valley for Gokyo Ri and the Cho Oyu lakes, then back to Namche and out. Two full acclimatization days are built in, at Namche Bazaar and at Dingboche, and the hardest day is the Base Camp push from Gorak Shep.
Here is the shape of it, as operated on the ground. Distances and walking times below are the real figures from the route, not marketing estimates.
Day 1: Arrival in Kathmandu (1,400m). Your guide meets you at Tribhuvan International Airport and drives you roughly 6 kilometers through the city to your Thamel hotel. The evening is for gear checks, permit paperwork and an early night. If you have never been to Kathmandu, an extra day here before flying to Lukla is worth it, and the heritage squares of the valley are covered in our guide to Kathmandu.
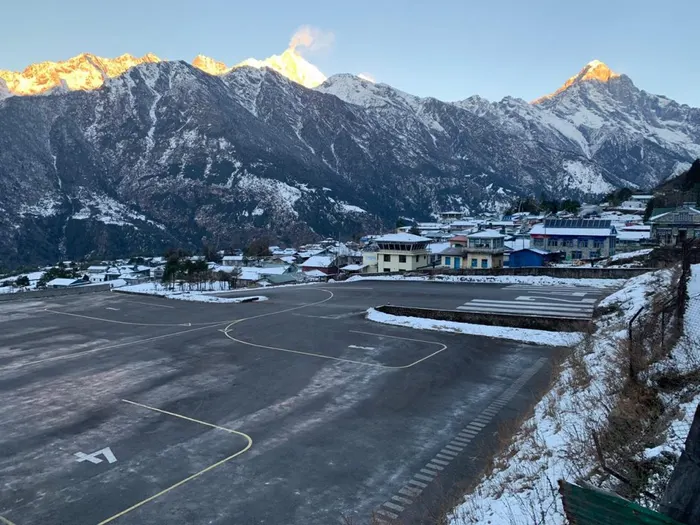
Day 2: Fly to Lukla (2,840m), trek to Phakding (2,610m). The mountain flight covers about 138 kilometers in roughly 35 minutes, and it is one of the great short flights in the world: Himalayan ridges out of the left window, terraced hills out of the right. From Lukla you walk down through Chaurikharka to Phakding, a short warm-up of three to four hours that also begins the altitude ladder properly. Your passports and two passport photographs come out here for the Khumbu permit.
Day 3: Trek to Namche Bazaar (3,440m), 11km, six to seven hours. The day of the big bridges. You cross and recross the Dudh Koshi on high suspension spans, pass the Sagarmatha National Park entrance at Monjo, and then climb the long switchback wall into Namche. This is the first genuinely hard day and the first place where pace discipline matters. Walk slowly. The reward is the Sherpa capital itself, a horseshoe of lodges, bakeries and gear shops stacked into a hillside amphitheatre.
Day 4: Acclimatization in Namche, Khumjung and Khunde, 8km, four to five hours. A rest day that is not a rest day. You climb to the Everest View Hotel at 3,880 meters for the first proper sight of Everest, then walk through Khumjung and Khunde, past the monastery that claims a yeti scalp and the Hillary school. Sleeping low after touching high is the whole point, and it is the single most important day on the trek.
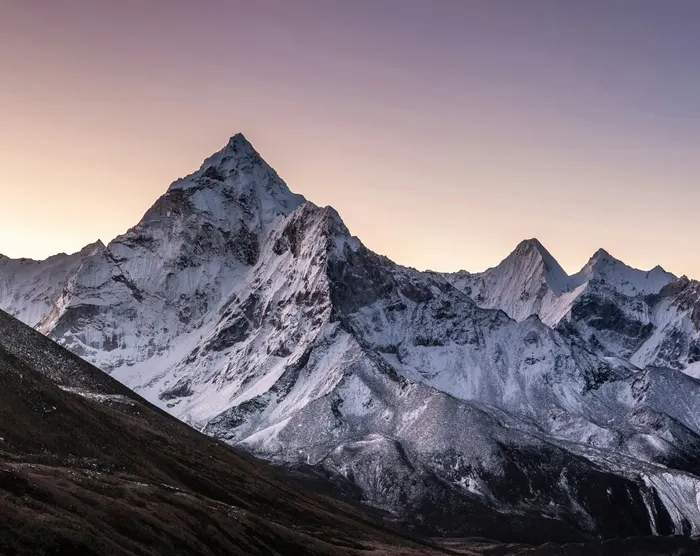
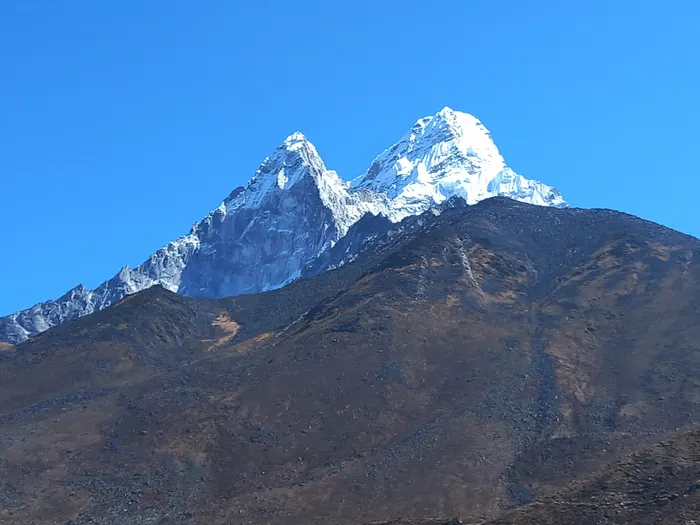
Day 5: Trek to Tengboche (3,860m), 10km, five to six hours. The trail traverses high above the Dudh Koshi with Ama Dablam dominating the skyline, passes the junction at Kyangjuma where the Gokyo and Everest routes split, and drops through rhododendron forest to Phunki Tenga before the climb to Tengboche. The monastery here is the largest in Khumbu, and the afternoon prayer ceremony is worth timing your arrival for.
Day 6: Trek to Dingboche (4,410m), 11km, five to six hours. Through Deboche and Pangboche, past the mani walls and the last of the tree line, into the wide open Imja Valley. Above this point the landscape turns to rock, scree and glacial moraine, and the air starts to feel thin in a way you notice on stairs.
Day 7: Acclimatization in Dingboche, Nangkartshang Peak (5,083m), 5km round trip, three to four hours. The second acclimatization day, and the more serious of the two. You climb Nangkartshang for a view that takes in Makalu to the east and Ama Dablam to the west, then descend to sleep at 4,410 meters. If you feel a headache coming on, this is the day to say so and take the rest option.
Day 8: Trek to Lobuche (4,940m), 8km, five to six hours. A shorter but demanding day along a wide, windswept valley floor, past the memorial chortens at Thukla where families remember climbers lost on Everest. The altitude is now the dominant fact of the day. Eat even when you do not want to.
Day 9: Everest Base Camp (5,364m), overnight Gorak Shep (5,140m), about 15km, seven to eight hours. The biggest day. You walk the moraine to Gorak Shep, drop your bag, and continue across the Khumbu Glacier rubble to Base Camp itself, where the icefall pours down between Everest and Nuptse and expedition tents cluster on the ice. Then back to Gorak Shep for the night. It is a long, exposed, often cold day, and there is no shortcut.
Day 10: Kala Patthar (5,545m) sunrise, cross to Dole (4,038m). A pre-dawn start for the climb to Kala Patthar, the highest point of the whole trek and the classic Everest sunrise view. Then the route turns west, dropping off the main corridor and across to Dole. This is the pivot day: the crowds thin out immediately, and the trek changes character.
Day 11: Trek to Machhermo (4,410m), 5km, four to five hours. A short day up the lower Gokyo Valley past rhododendron stands and small waterfalls. Short is deliberate. You are climbing again after a big descent, and the extra afternoon at altitude does more for your acclimatization than another kilometer would.
Day 12: Trek to Gokyo (4,790m), 6km, four to five hours. Past the first, second and third lakes, each a different shade of turquoise, with the Ngozumpa Glacier's grey moraine ridge running along the eastern side of the valley. Gokyo village sits above the third lake.
Day 13: Gokyo Ri (5,357m) sunrise and the fourth and fifth lakes. The summit morning of the trek. You climb Gokyo Ri before dawn, roughly two hours up, for Everest, Lhotse, Makalu and Cho Oyu lined up in one panorama. Later, an optional walk to the fourth and fifth lakes brings you to the approach used by Cho Oyu expeditions, with the mountain's west face filling the head of the valley.
Day 14: Descend Gokyo to Machhermo and Dole (3,830m). A long, easy-feeling descent as the oxygen comes back. Knees get tested here, so poles and a slow rhythm pay off.
Day 15: Trek to Namche over the Mong La, fly out. About 12 kilometers, climbing the Mong La pass with its chorten and prayer flags, then descending through Phortse Thanga to Namche Bazaar for the flight back to Kathmandu.
How Hard Is the Cho Oyu Viewpoint Route Compared With Standard EBC?
Harder, but not in the way most people fear. The daily walking is comparable to a standard Everest trek: mostly five to seven hours, with one long Base Camp day. What makes this route harder is the shape of it. You reach 5,545 meters on Kala Patthar, descend below 4,100, then climb back to 5,357 on Gokyo Ri. Two high points in one trek demand more recovery, more food, and more honest self-monitoring than a single out-and-back.
In practice, trekkers who prepare for the standard Everest trek and then add two things handle this route well: a slightly longer training runway, and a firm commitment to the two acclimatization days. The common failure is not fitness. It is impatience, usually on day three when the Namche switchbacks feel easy and the temptation is to push the next day too hard.
Grade-wise, treat it as a demanding trekking route rather than a mountaineering objective. There is no rope work, no crampons, no glacier crossing on the main line to Base Camp. The technical demand is zero. The physiological demand is high, and the weather exposure on Kala Patthar and Gokyo Ri is real: both summits are cold, windy and often clouded until the sun clears the ridges. Our honest assessment of how hard the Everest Base Camp trek is gives the day-by-day difficulty benchmark to measure yourself against before booking.
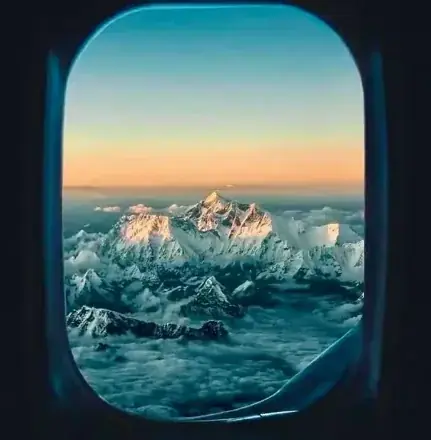
One more honest point: Gokyo Ri is a 5,357 meter climb from a 4,790 meter village, so it is roughly 570 meters of ascent in about two hours. Compare that to the standard advice of sleeping no more than 500 meters higher than the previous night. It works because you have already spent a week and a half above 4,000 meters by then, but it is exactly why an abbreviated version of this itinerary, squeezing Gokyo into eleven or twelve days, is a bad idea.
Best Time to Trek the Khumbu and Gokyo Valleys
Two windows dominate: late September to November, and March to May. Autumn brings the most stable air, the clearest mountain views and the busiest trails. Spring brings warmer days, rhododendron in bloom below Namche, and more haze plus occasional afternoon cloud on the high ridges. Winter is possible and beautifully quiet, but cold enough that many lodges close above Pheriche, and summer monsoon brings leeches, cloud and unreliable Lukla flights.
For this specific route the autumn window has a practical advantage. Gokyo Ri is a sunrise summit, and the clear, cold, post-monsoon mornings of October and early November give the highest probability of the full four-peak panorama. March and April are excellent too, with longer daylight and softer temperatures at Base Camp, but the haze can soften Makalu on the eastern horizon.
If you go in winter, read our Everest Base Camp trek in winter guide first, because the Gokyo side is significantly colder and emptier than the main trail, and some lodges at Machhermo and Gokyo shut entirely. Month-by-month detail for the main corridor lives in our best time for Everest Base Camp trek guide and the wider month by month guide to visiting Nepal.
How Much Does the Everest Base Camp and Cho Oyu Trek Cost?
The 15-day package starts at $2,825 per person on the international budget tier, with a luxury tier at $3,390 and a SAARC national rate of about $2,401. That price covers the airport transfers, two nights of Kathmandu hotel with breakfast, the round-trip Kathmandu to Lukla flights with transfers, 14 nights of teahouse accommodation, a licensed guide and porter support, permits and the standard trekking meals on the trail.
What it does not cover is where most budgets go wrong. International airfare, the Nepal visa, lunch and dinner in Kathmandu, personal gear, tips, and travel insurance are all outside the package. The insurance is not optional: helicopter evacuation coverage to 6,000 meters is a condition of joining, and a policy that covers trekking to that altitude with rescue typically costs $120 to $300 for three weeks. An uninsured helicopter lift from Gorak Shep bills $5,000 to $10,000.
On the trail, budget separately for the small economy that every teahouse runs. Hot showers run NPR 300 to 700. Wi-Fi runs NPR 300 to 600 per day and gets unreliable above 4,500 meters. A meal costs NPR 500 to 900 lower down and NPR 800 to 1,500 above 4,000 meters. Boiled water is $1 to $2 per liter, and purifying your own saves real money over two weeks. Add $20 to $40 for connectivity, $3 to $5 per shower, $1 to $3 per device charge, and a tip pool of roughly 5 to 10 percent of the trek cost.
For the full line-by-line picture across every tier, including flight alternatives and gear rental, read our Everest Base Camp trek cost breakdown. The short version: a comfortable all-in figure for this itinerary, including flights to Nepal, insurance, tips and trail spending, sits closer to $4,000 to $5,000 than to the package price alone.
Permits, Fees and Paperwork for the Khumbu
Two permits are needed for this route, and no more. The Sagarmatha National Park entry permit costs NPR 3,000 for foreign nationals, roughly $23, and NPR 1,500 for SAARC nationals. The Khumbu Pasang Lhamu Rural Municipality permit costs NPR 2,000, about $15, and is bought in Lukla before you start walking. Both require your passport and two passport-sized photographs.
There is no restricted-area permit for the Khumbu or Gokyo valleys, and no TIMS card is required for this route in the way it is for Annapurna. Note the distinction: the government TIMS card applies to many trekking areas, while the Khumbu has its own municipal permit system. If you are combining this trek with a restricted-area route such as Manaslu or Upper Mustang, the paperwork changes completely, and the fees are much higher.
Budget $70 to $90 per person for the full permit stack including agency handling, and let your guide carry the documents. Independent trekking rules in the Khumbu have shifted repeatedly in recent seasons, and enforcement at Monjo and Lukla varies, so the practical answer is to travel with a licensed guide and let the permit question disappear. For the national picture across every region, read our guide to Nepal trekking permits and TIMS, and for the routes and entry points around this trek see the Everest region guide.
How Do You Manage Altitude on a 15-Day Khumbu Trek?
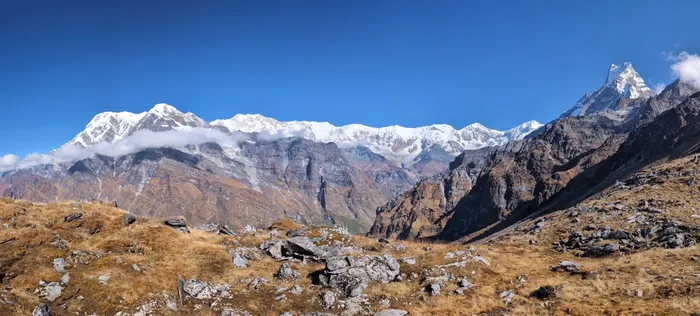
You manage altitude with three habits: a slow ascent above 3,000 meters, two scheduled acclimatization days, and honest daily self-checks. The working rule is to sleep no more than 500 meters higher than the previous night once you are above 3,000 meters, with a rest day every 1,000 meters of sleeping altitude. Walk high, sleep low on rest days, drink three to four liters of water daily, and treat alcohol above Namche as off the menu.
This itinerary already builds the structure in. Namche at 3,440 meters is followed by an acclimatization day. Dingboche at 4,410 meters is followed by a climb to Nangkartshang Peak at 5,083 meters and a night back at 4,410. Then comes the push to Lobuche, Gorak Shep and Base Camp. The pivot to Dole at 4,038 meters after Kala Patthar is a deliberate and useful reset before the second high point.
The part you control is the pace on the way up. The most common altitude mistake is not the summit day, it is day three: feeling strong on the Namche switchbacks, then walking six hours instead of four the next day because the weather is good. Altitude illness is cumulative and delayed. A headache that starts at dinner is a signal from four hours earlier.
Know the symptoms and know the response. Headache, nausea, dizziness, loss of appetite and disturbed sleep are acute mountain sickness. Stop ascending, hydrate, rest, and if symptoms worsen, descend. Severe headache with vomiting, confusion, breathlessness at rest or an unsteady walk means immediate descent and evacuation, not another night. Our detailed guides to preventing altitude sickness on the Everest Base Camp trek and to altitude sickness prevention and acclimatization cover the protocols in full, including the medication decisions worth discussing with a travel doctor before you fly.
Where Do You Sleep on the Khumbu and Gokyo Trails?
In teahouses, every night, for 14 nights. A teahouse is a family-run lodge with a heated common room, twin rooms with thin walls, shared bathrooms, and a menu built around dal bhat, noodles, potatoes and eggs. Rooms get simpler and colder as you climb. Below Namche you will find hot showers and attached bathrooms; above Dingboche, bucket showers and shared facilities are the norm, and above Gorak Shep everything freezes at night.
The Gokyo side is noticeably quieter and slightly more basic than the main trail. Gokyo village has a cluster of lodges above the third lake, and Machhermo and Dole have a handful each. Book through your guide rather than online, because the lodges do not run modern reservation systems and the guide's relationship with the owner is what secures a room in a busy October.
Three practical habits make teahouse nights much better. Carry a four-season sleeping bag rated to at least minus 15 Celsius, because blankets are provided but not always enough. Carry earplugs, since the dining room stays loud until late and the walls are plywood. And charge devices during the day rather than at night, when lodges often switch off the solar circuit. Our teahouse and lodge guide covers every overnight stop in detail, including what each village actually offers.
Gokyo Ri Sunrise: The Four 8,000m Peaks in One Frame
Gokyo Ri is a 5,357 meter ridge crest above Gokyo village, and the climb from the lodges takes roughly two hours in the dark. Leave around four in the morning with a headlamp, follow the switchbacks, and you will reach the prayer flags and cairn well before first light. What happens next is the reason this route exists.
As the sky lightens, Everest and Lhotse rise together on the left, connected by the South Col. Makalu stands far to the east, a broad, distant massif. And directly west, filling the head of the valley, is Cho Oyu, a huge rounded wall of snow and ice that catches the first sun while everything else is still blue. Below you, the Ngozumpa Glacier runs south like a grey river, and the Gokyo Lakes sit in a chain of impossible turquoise. On a clear morning you can name four of the fourteen 8,000 meter peaks in the world without turning your head.
Two warnings. It is brutally cold on the summit before sunrise, so bring your down jacket, gloves, hat and a thermos. And do not plan to be back at the lodge by nine and walking by ten. Most people need an hour on top just to stop shaking and let the light do its work, and the descent is slower than it looks on tired legs. If photography is the reason you are here, our Everest photography trek pairs this valley with a professional guide who plans the light windows in advance.
What Gear Do You Actually Need?
You need four layers, two pairs of boots that fit, and a sleeping system, plus a handful of small items that make the difference between comfortable and miserable. The core list is a base layer set, a fleece or insulated mid layer, a down jacket rated to minus 15 Celsius, a waterproof shell, trekking trousers, a warm hat, gloves, sunglasses and sunscreen. Boots must be broken in before you fly, and a second lighter pair for lodge evenings is worth the weight.
The sleep system is a four-season sleeping bag, rentable in Kathmandu if you do not want to buy, plus a silk liner. Add trekking poles, which save your knees on the long descents from Kala Patthar and Gokyo, a headlamp with spare batteries, a wide-mouth water bottle, purification tablets or a filter, a basic medical kit, and a power bank. Cash matters: ATMs exist only in Namche, and above that everything is cash.
Two items specific to this route. A polarizer or variable ND filter is genuinely useful for the Gokyo Lakes, because the turquoise water blows out easily in bright sun. And a buff or balaclava is not optional on the Kala Patthar and Gokyo Ri mornings, where wind chill is the real limit on how long you can stay. Our full Everest Base Camp packing list breaks this down season by season, with rental prices for the bulky items.
How Does This Trek Compare With the Three Passes Trek?
The Three Passes trek is the harder, higher and more technical-feeling cousin. It crosses three passes above 5,300 meters, Renjo La, Cho La and Kongma La, linking the same two valleys by a much more demanding line. This 15-day trek uses the Gokyo Valley and the Mong La instead, keeping every crossing below 5,400 meters and removing the exposed pass days entirely.
The practical difference is commitment. Three Passes is an 18-day proposition at a higher grade, with longer days, more exposure and rougher trail over the Cho La glacier section. Our Everest Three Passes trek is the right choice if you have already trekked in the Himalaya and want the full traverse. If this is your first or second high-altitude trek, the Base Camp and Cho Oyu viewpoint route delivers the scenery with a much more forgiving profile.
There is also a middle option worth knowing: the 16-day Gokyo Lakes and Everest Base Camp trek via Cho La, which links the valleys over the Cho La pass at just over 5,300 meters. It is one day longer and a step up in difficulty, and it removes the need to walk back to Namche on the return. Compare all three side by side before you commit, and read our Three Passes trek guide and Gokyo Lakes trek guide for the detail.
What Are the Most Common Mistakes on This Route?
Four mistakes account for most of the disappointment. Going too fast in the first four days. Skipping or shortening the Dingboche acclimatization day. Treating Base Camp as the finish line and arriving at Gokyo exhausted. And packing for the photograph rather than for the temperature, which is how people end up missing the Gokyo Ri sunrise because they were too cold to enjoy it.
There are smaller ones worth naming. Booking a Lukla flight without a weather buffer, then panicking when the first morning is cancelled. Our guide to Lukla flights and weather delays explains why the Ramechhap diversion happens and how to plan around it. Choosing the cheapest possible operator and discovering that porter loads, insurance and evacuation cover were never included. And trekking without reading the basics first, which is what our Everest Base Camp guide for first timers exists to prevent.
One more, specific to this itinerary: assuming the Gokyo side is warm because it is lower on the map. Gokyo village sits at 4,790 meters beside a glacier, and the valley funnels wind. Trekkers who sent their down jacket back to Kathmandu with a porter usually regret it on day twelve. Pack for 5,500 meters and you will be comfortable at 4,000.
How to Book, Train and Prepare
Book eight to twelve weeks out if you can. That gives you time for a training block, a travel insurance policy that specifically covers trekking to 6,000 meters with helicopter evacuation, and a realistic gear check. The permit paperwork and the Lukla flights are handled by the operator, but the insurance is yours to arrange and is genuinely checked before departure.
Training should be simple and consistent. Three or four cardiovascular sessions a week, cycling, running or swimming, plus stair climbing with a loaded daypack building toward 1,000 meters of ascent in a single session, plus long weekend walks of 15 to 20 kilometers. Strength work for the legs and core helps the descents more than people expect. If you can walk five hours on consecutive days with a 7 kilogram pack, you are physically ready for the walking. The altitude is the variable nobody can train.
Finally, decide what you want the trek to be. If Base Camp is the emotional goal, the standard 12 to 14 day itinerary is cheaper and shorter. If you want the mountain panorama and the quieter valley, this route is worth the extra days and the extra cost. If you are travelling alone, read our solo versus guided Everest Base Camp guide before you choose a format, and if you have more time than money, the classic Jiri route walks in from the road head and arrives in the Khumbu fully acclimatized.
For a broader sense of what is possible around these mountains, from a five-day Namche panorama hike to a 12-day photography trek, browse the Everest-region options at Everest Region and compare the Everest View short trek, the Everest comfort trek and the Gokyo Valley luxury trek with a scenic Everest helicopter tour. If your group includes someone who cannot walk the full route, the helicopter tour in Nepal and the Kathmandu Mount Everest scenic flight both deliver the view without the climb.
The Everest Base Camp and Cho Oyu viewpoint trek is the itinerary for travellers who want the mountain, not just the milestone. You get the icefall and the memorial chortens and the cold dawn on Kala Patthar, and then you get something most Everest trekkers never see: a quiet valley, six turquoise lakes, the longest glacier in the Himalaya, and four 8,000 meter peaks lined up at sunrise from a ridge you climbed yourself. Fifteen days is the honest price of that combination. If the calendar works, talk to our team about dates, or start with our guide to cultural and spiritual travel in Nepal if you want to pair the trek with the Kathmandu Valley.